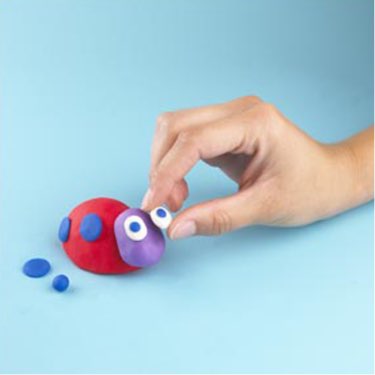
Play-Doh How-To: make a ladybug
Hey, parents! Your littles worked hard to make a cute ladybug, so why not show it off? Share their creation with us using #ShareThePlay, we can’t wait to see what they crafted!

mold the body and head
Our ladybug has a big body so she can really spread her wings! Use red Play-Doh compound to create an oval shape for the body. Next, we used purple Play-Doh compound to make the head, but your little love bugs can use whatever color they’d like! Roll it into a ball and gently squeeze it down into a pear shape.

make eyes and dots
White and blue Play-Doh compound make silly eyes for their ladybug. Just make small ovals of white Play-Doh compound, and small circles of blue. Place the blue pieces over the white pieces, then place that on the face! Use more blue Play-Doh compound to create dots of all sizes to place on the ladybug’s body.

antennae and a smile!
Use a little more blue Play-Doh compound to give the ladybug a smile, and some purple to make antennae. Wow, she looks so adorable!

ladybug is ready for play!
That didn’t take much time at all! And now we have a cute Play-Doh ladybug to play with. They can add so much more, too! Maybe a blade of grass for it to munch on, or a stick for it to climb. Play-Doh compound can make just about anything, so watch ’em make a whole world for their ladybug to explore!